Audiences
This topic explains how to create and manage Audiences via our API or within the DevCycle dashboard.
Audiences allow you to define an audience using filters, and then reuse the audience in user targeting for features. Audiences are lists of users, defined by “filters” that you can use to manage flag targeting behaviour in bulk. Audiences are useful for managing groups of users, like internal-users or loyalty-tier-gold.
Creating an Audience
From the API
The first step is to create an audience through the Management API:
curl --location 'https://api.devcycle.com/v1/projects/{project-key}/audiences' \
--header 'Authorization: Bearer $TOKEN'
--header 'Content-Type: application/json' \
--data '{
    "name": "Reusable-Audience",
    "key": "reusable-audience",
    "description": "A reusable audience!",
    "filters": {
        "filters": [
            {
                "type": "user",
                "subType": "user_id",
                "comparator": "=",
                "values": [
                    "my-user"
                ]
            }
        ],
        "operator": "and"
    }
}'
This will return you a response of the created resource which includes an _id field which will be used to include the Audience in the targeting rules of your feature.
Refer to the Management API docs for more information.
To use your new audience in a feature, you must use the Feature Configuration endpoint to update the targeting rules:
curl --location --request PATCH 'https://api.devcycle.com/v1/projects/{project-key}/features/{feature-key}/configurations?environment={environment-key}' \
--header 'Authorization: Bearer {token}' \
--header 'Content-Type: application/json' \
--data '{
    "targets": [
        {
            "name": "Feature Enabled",
            "distribution": [
                {
                    "percentage": 1.0,
                    "_variation": "variation-a"
                }
            ],
            "audience": {
                "name": "Reusable Audience",
                "filters": {
                    "filters": [
												// Audience Match Filter
                        {
                            "type": "audienceMatch",
                            "comparator": "=",
                            "_audiences": [
																// Audience _id from creating a reusable
																// audience from the Management API
                                "63dd5a34cf6c623a40078a32"
                            ]
                        }
                    ],
                    "operator": "and"
                }
            }
        }
    ],
    "status": "active"
}'
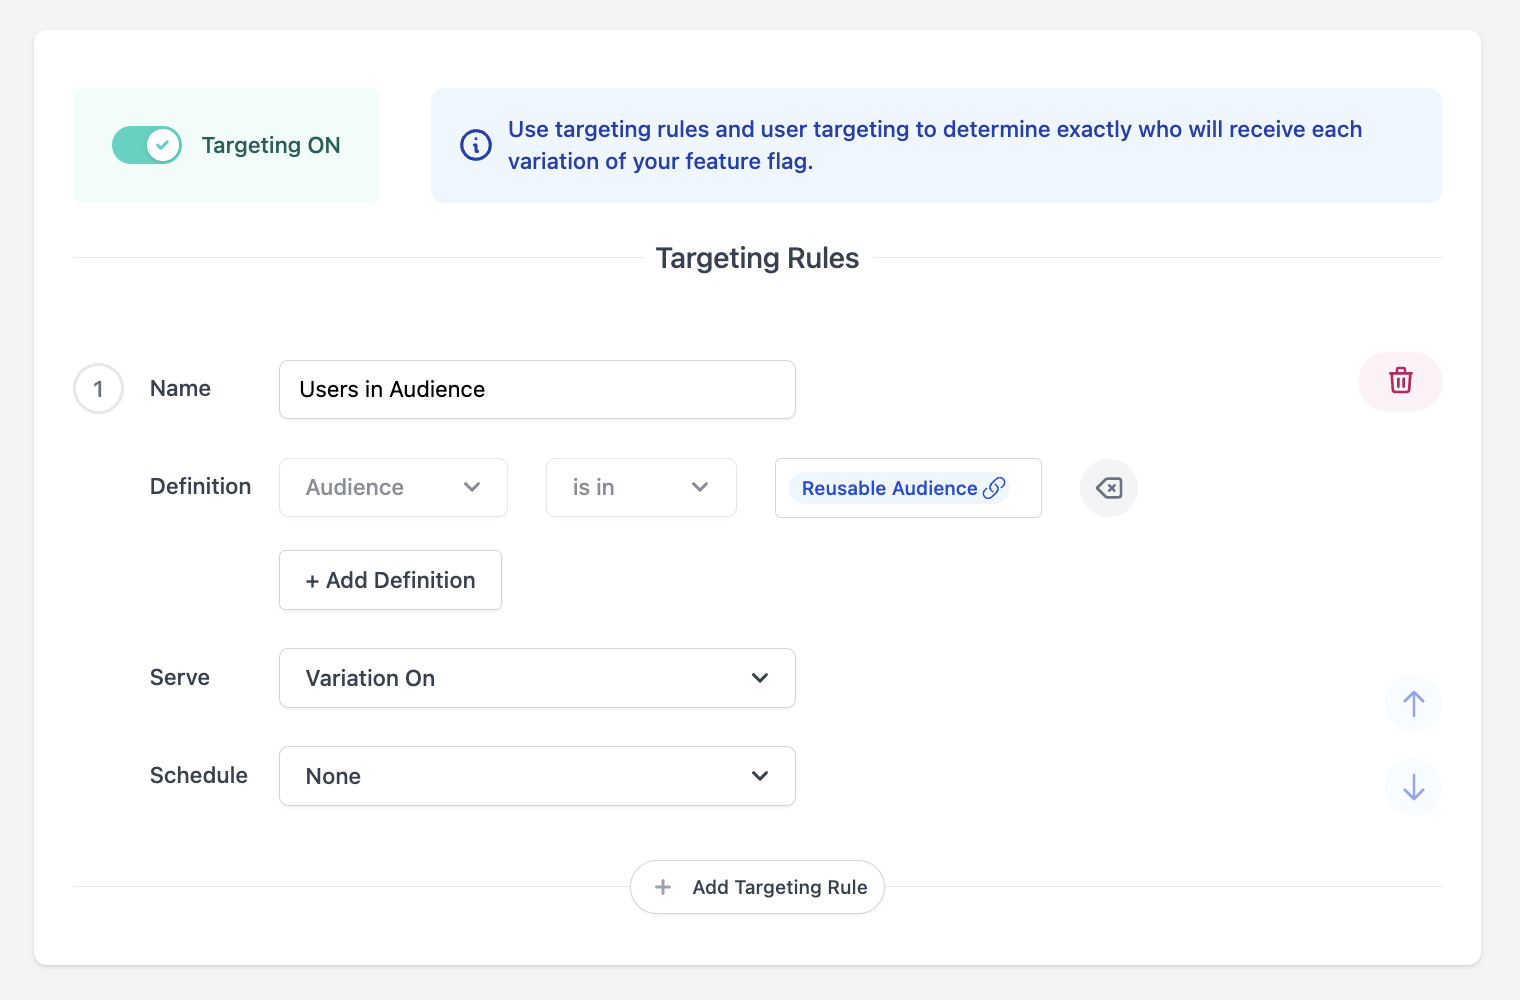
Under the filters array, you can list an Audience Match filter that is used to reference any Audiences in the _audiences array by _id.
You will see this in the Targeting Rules section of the feature page as a read-only field:
From the Dashboard
When Audiences have been enabled for your organization, you will see an Audiences tab at the top of your navigation bar. Here you will be able to view all Audiences that have been created within your project.
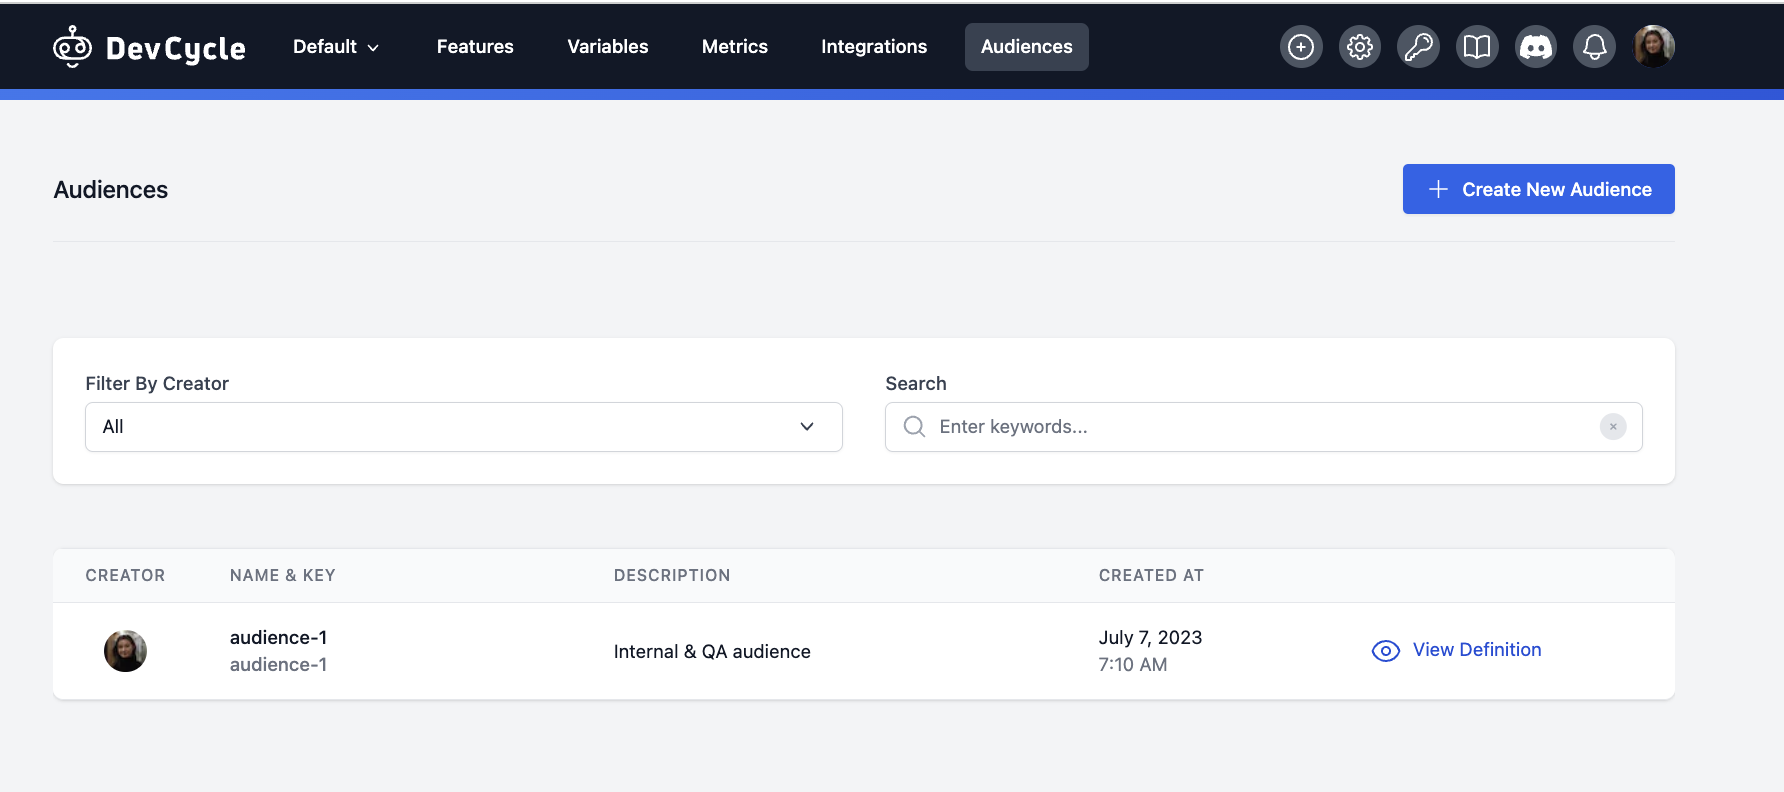
To create a new Audience within the DevCycle Dashboard:
- Navigate to the Audiences tab.
- Click Create New Audience and the Create New Audience modal will appear.
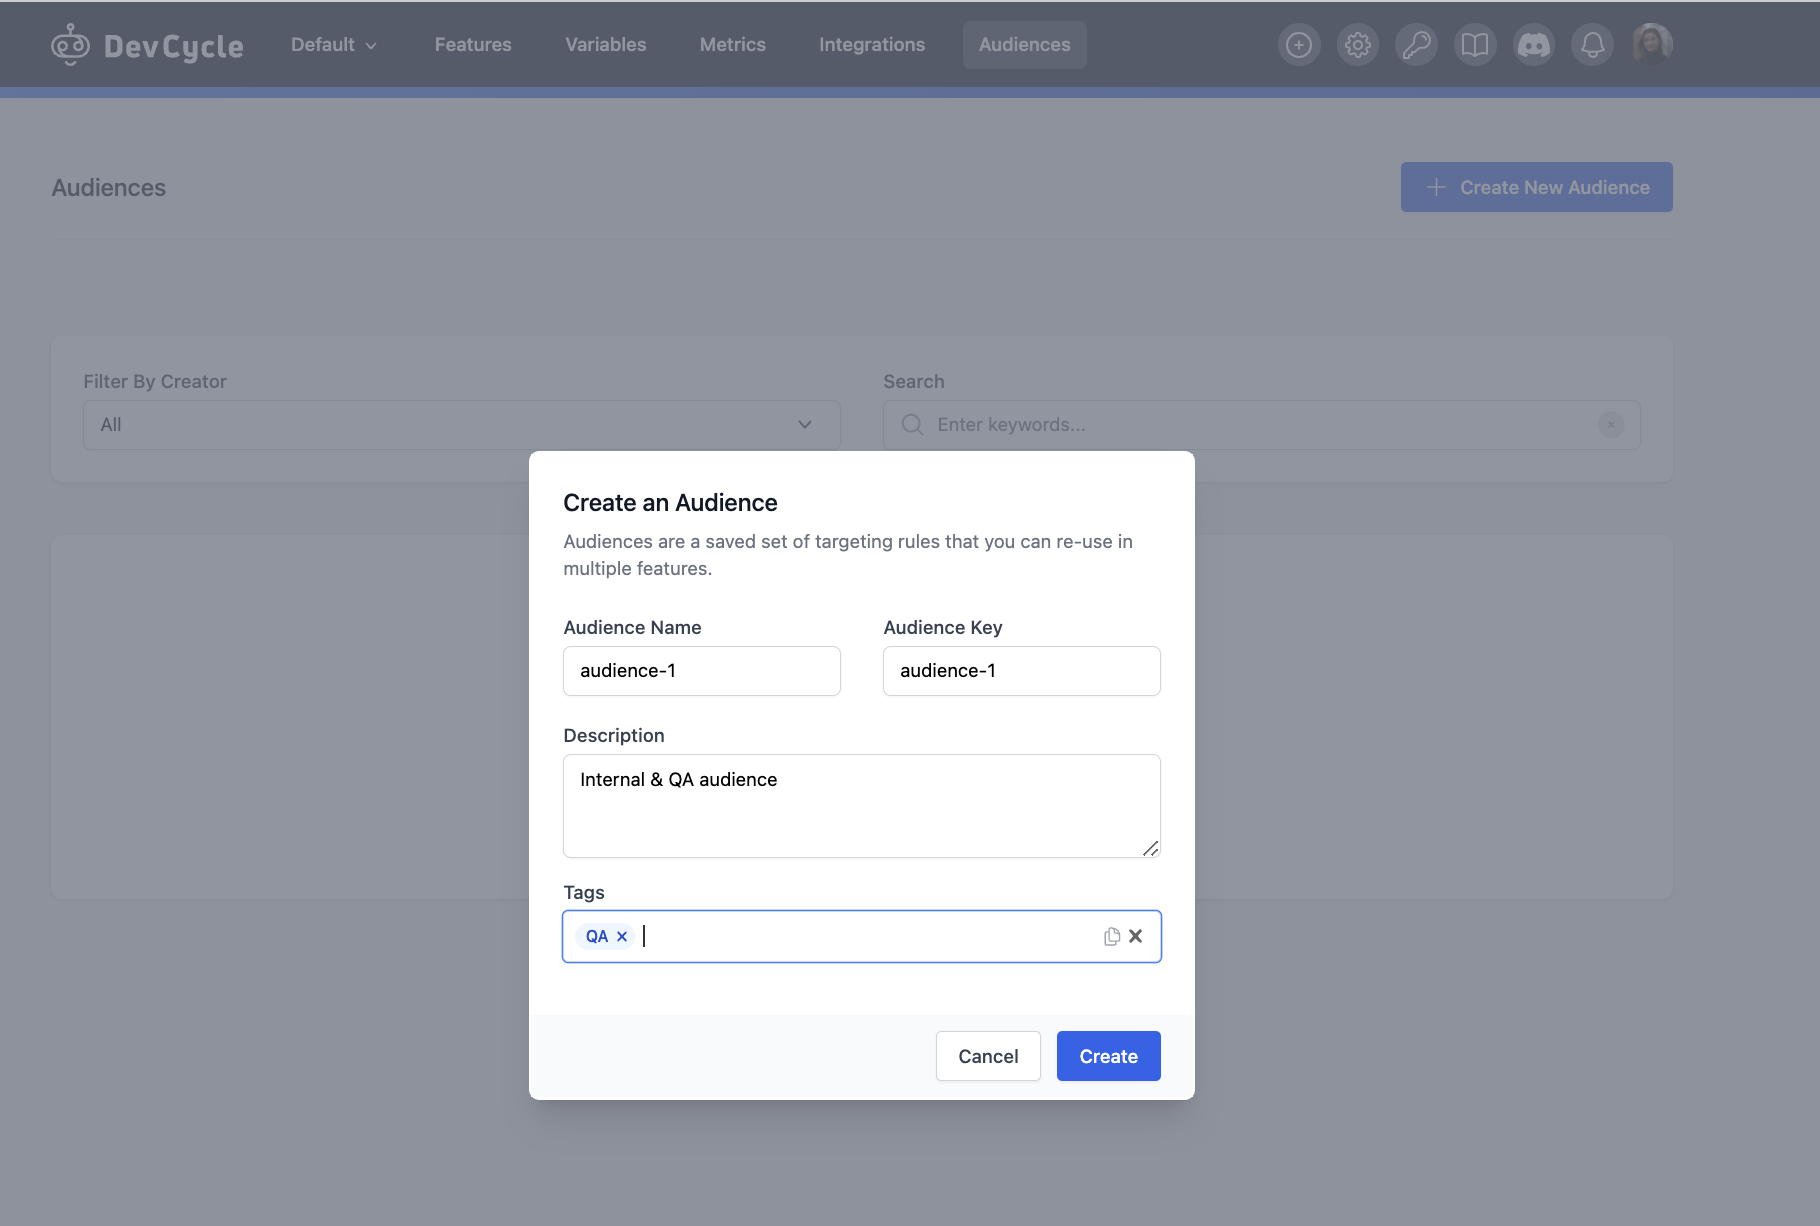
- Give your segment a human-readable Audience Name.
- Enter an Audience Key for this Audience (this field auto-populates based on the Audience Name, but you can change it if you need to)
- (Optional) Add a Description.
- (Optional) Add Tags.
- Click Create and you’ll be taken to your newly created Audience details page. The Info section will have the same details that you entered into the modal.
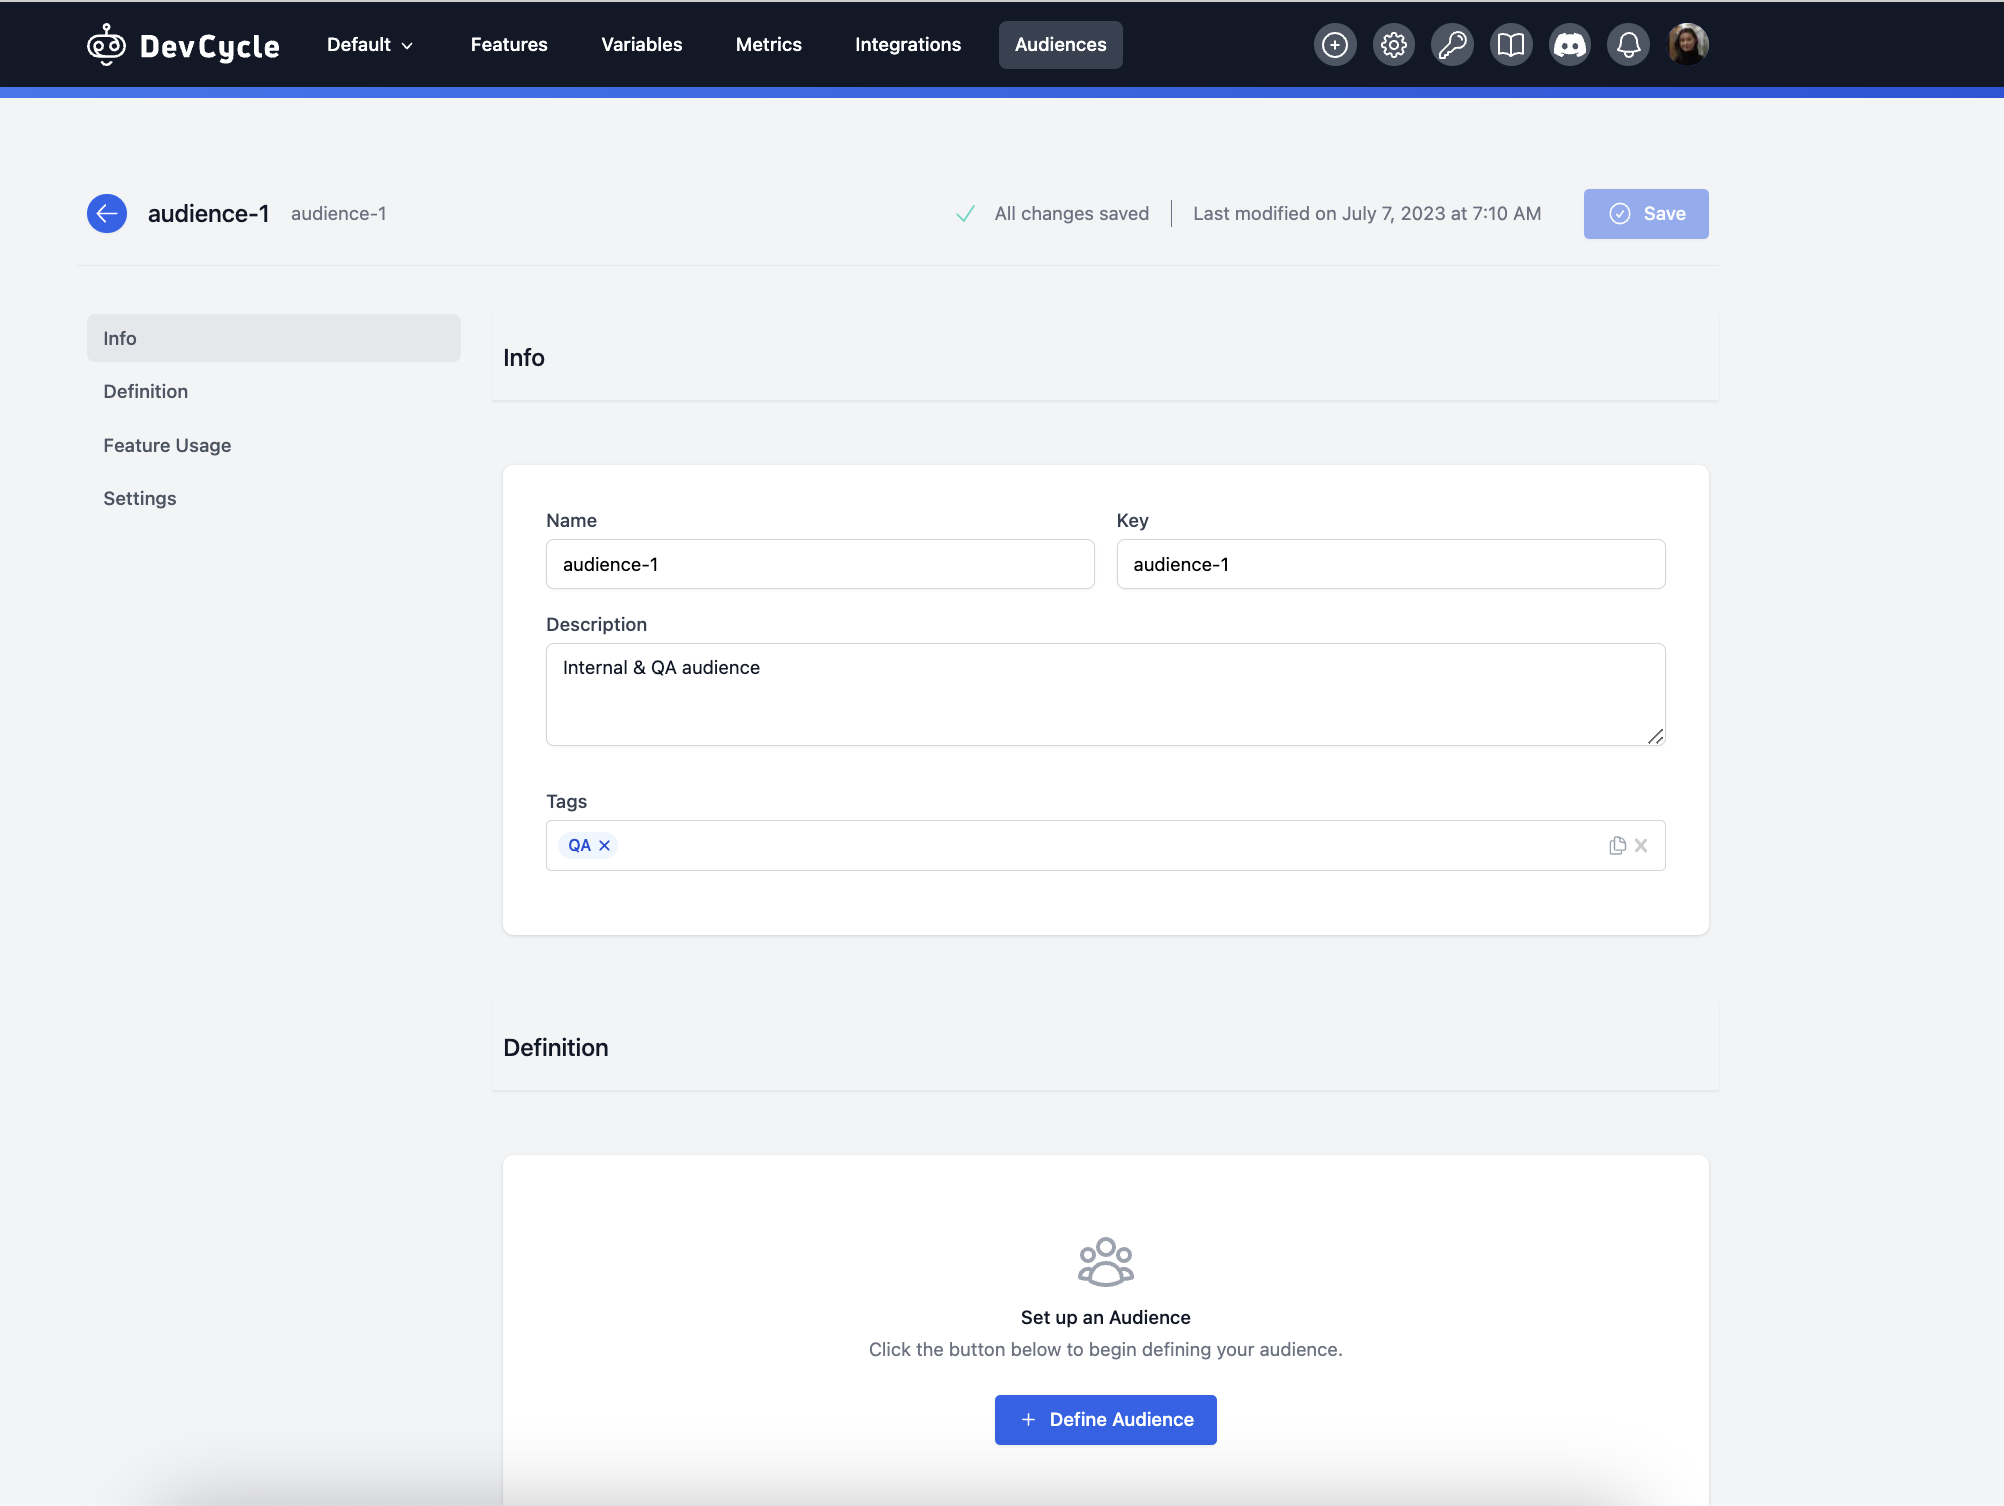
- Scroll down or click on Definition in the side bar. Click
Define Audienceand the same interface that is used to create targeting rules will appear. We have also introduced the ability to have top-level ORs within an Audience.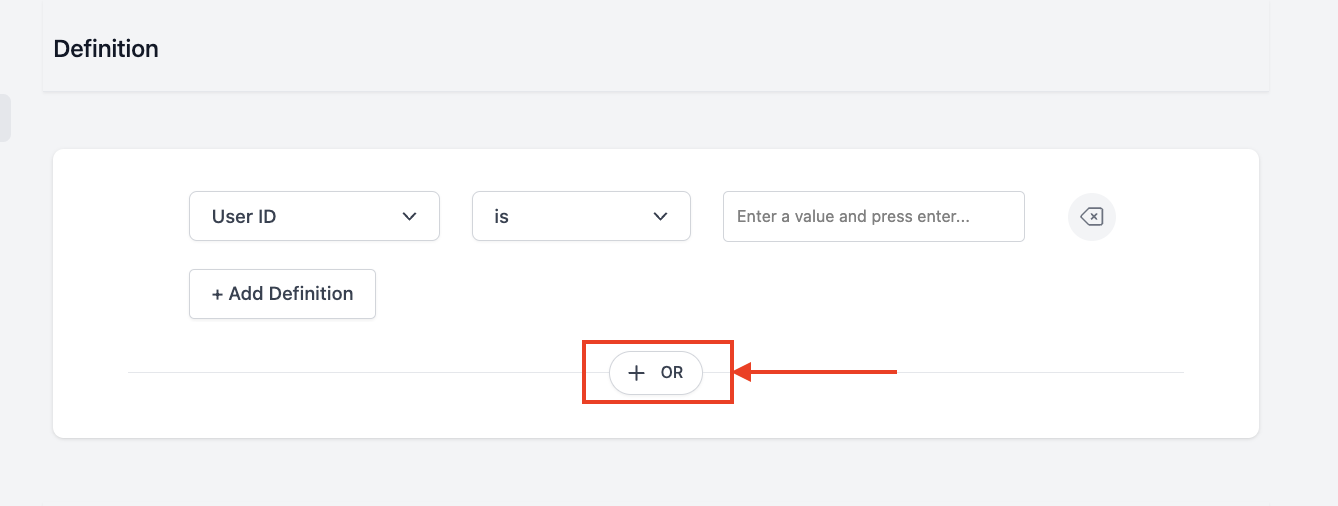
- Define your Audience.
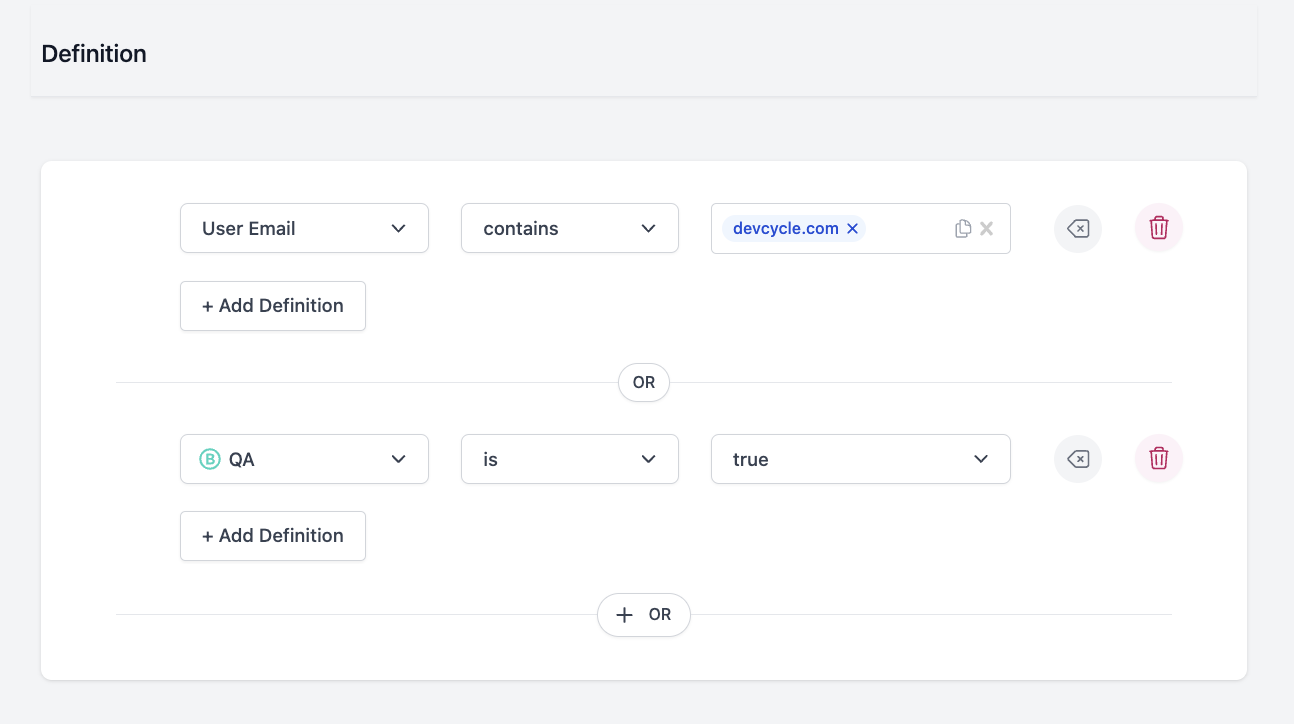
- Click Save at the top of the page when complete.
- You can now use this Audience when defining a Targeting Rule within a Feature
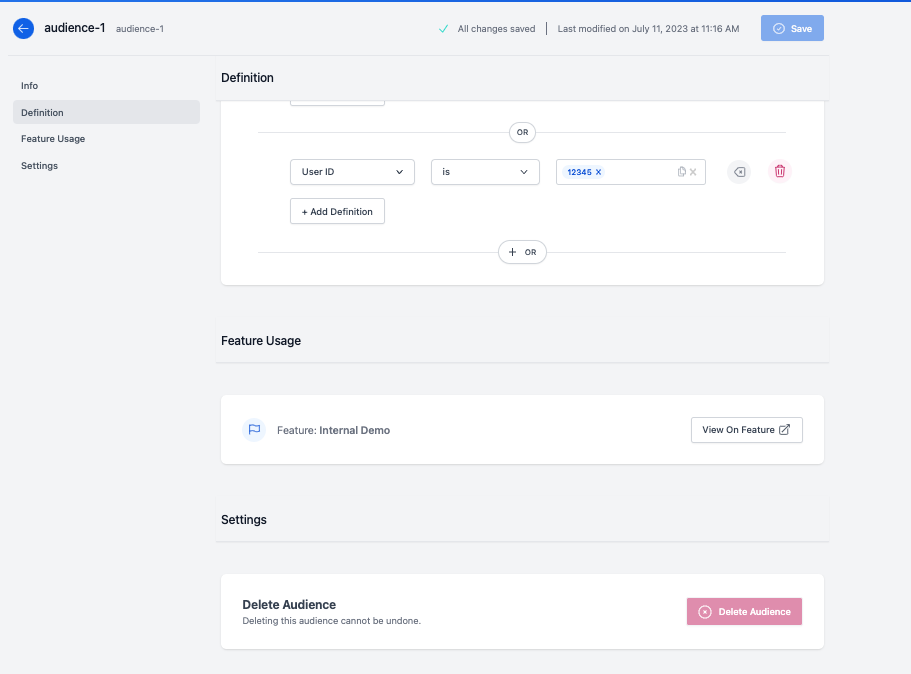
In addition to the Audience Info & Definition, in the Feature Usage secion for the Audience Detials page you will also be able to view the Features that are actively using that Audience.
Updating Audiences
From the API
To see all your created Audiences, click the Audiences tab on the navigation bar:
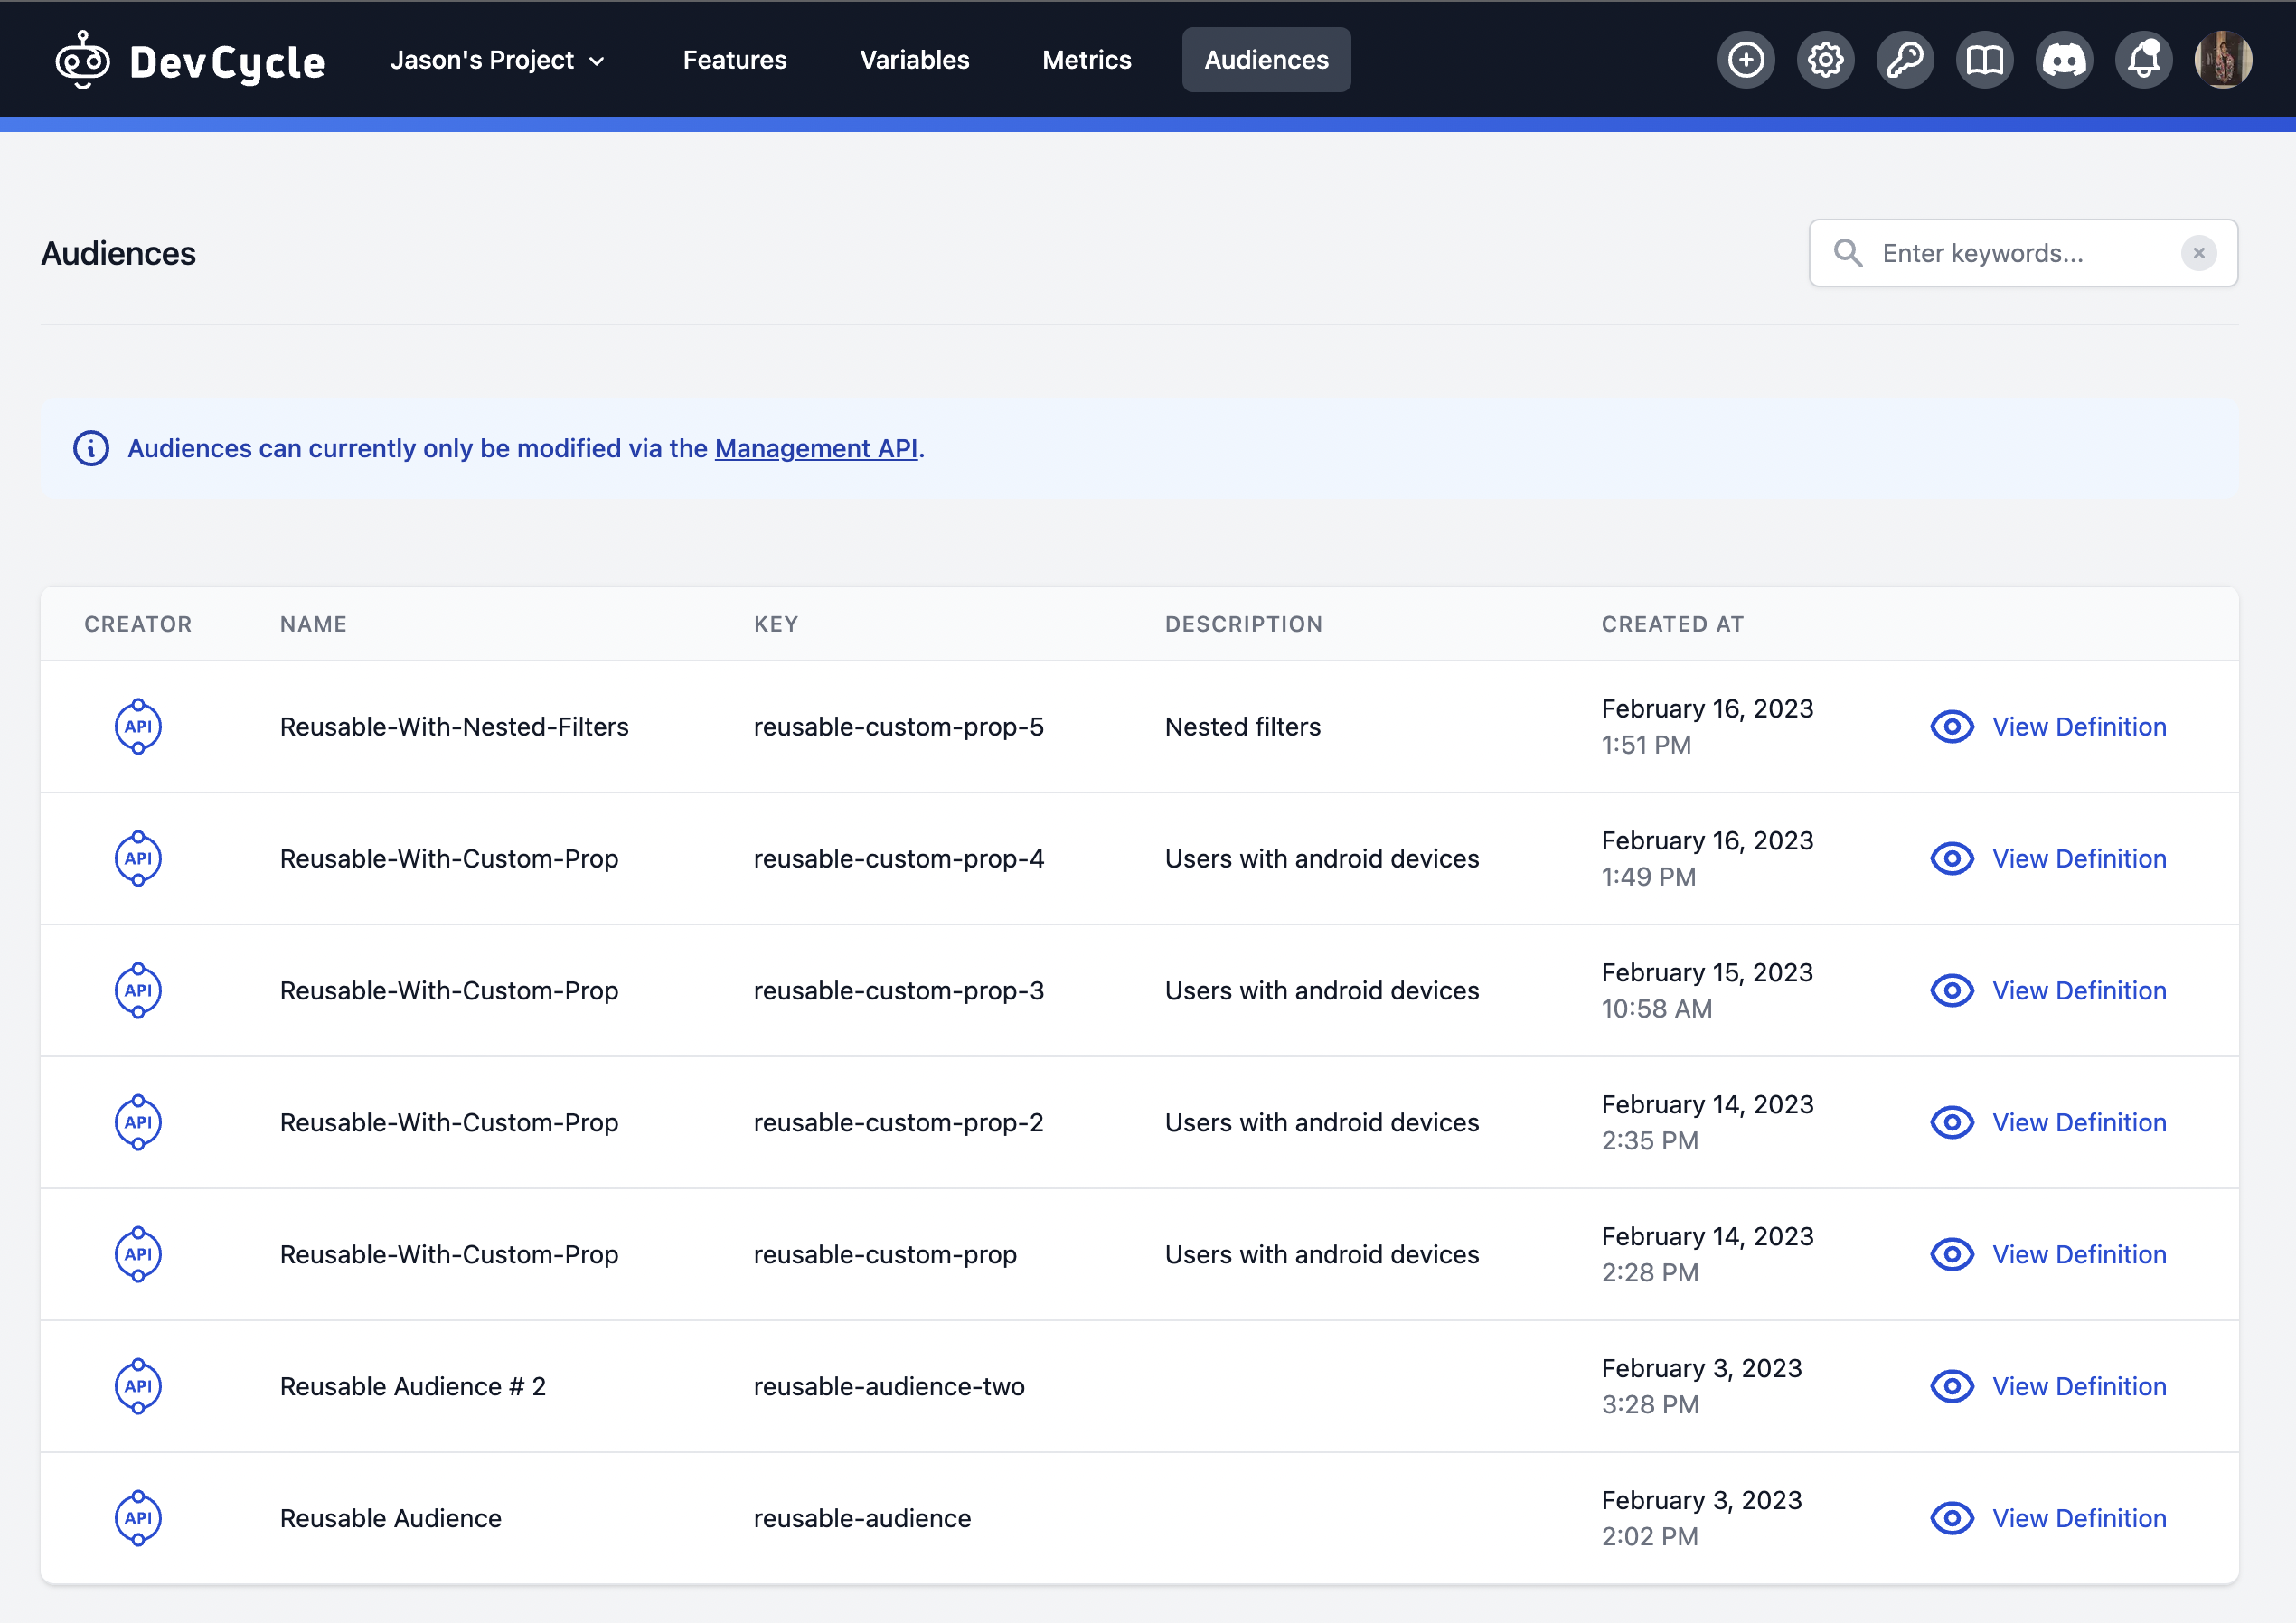
This lists all Audiences created through the Management API. At the moment, the audiences can only be modified through the Management API. As such, all the Audiences on this page are read-only.
To view more information about the Audience, click the View Definition button to see more:
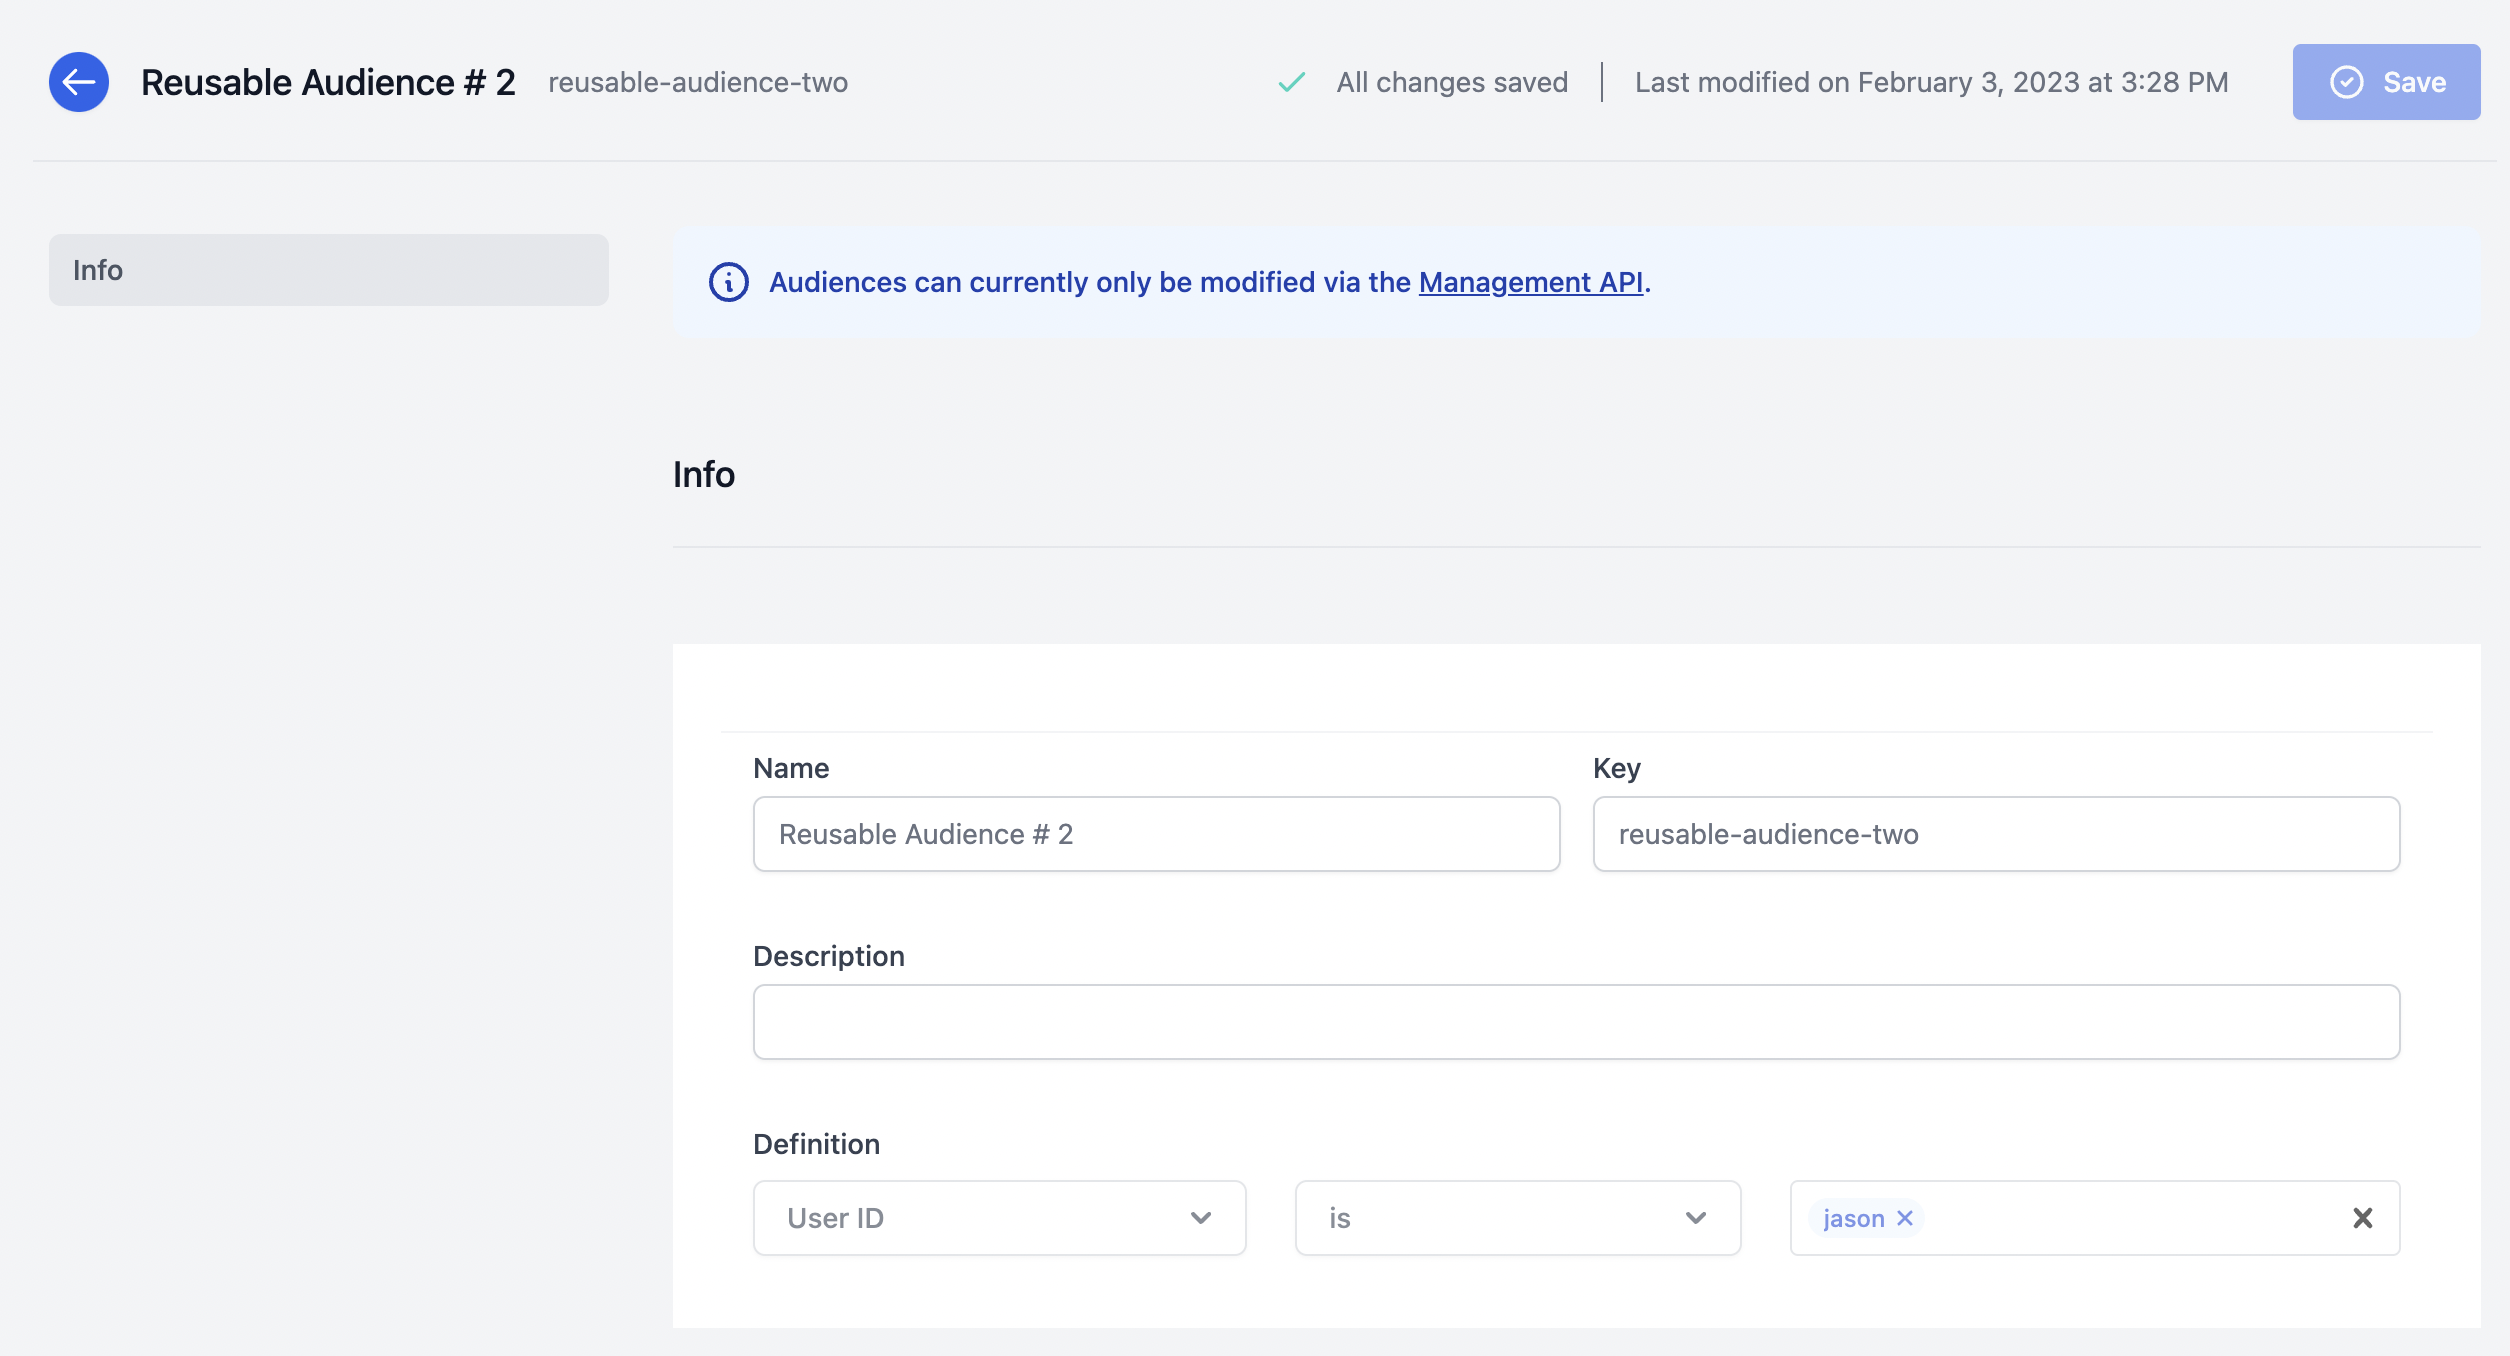
From the Dashboard
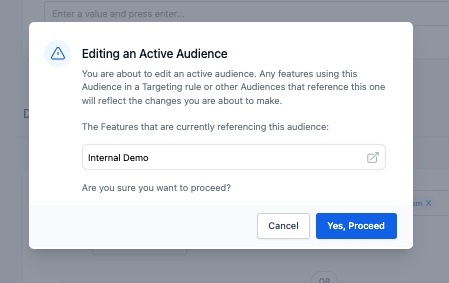
If you wish to update or edit an active Audience, a warning message will appear that displays all Features that are actively using that Audience.
Using an Audience
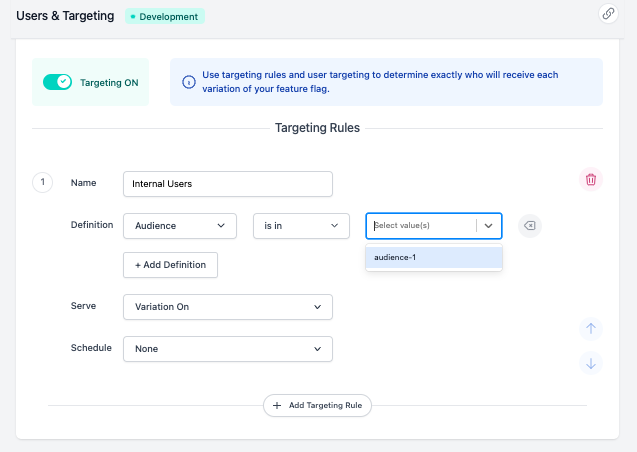
Once you've created an Audience, you will now be able to use it in a Targeting Rule for one or multiple features.
To use an Audience in a Targeting Rule:
-
Navigate to the Users & Targeting section of a feature page
-
Give your Targeting Rule a descriptive Name.
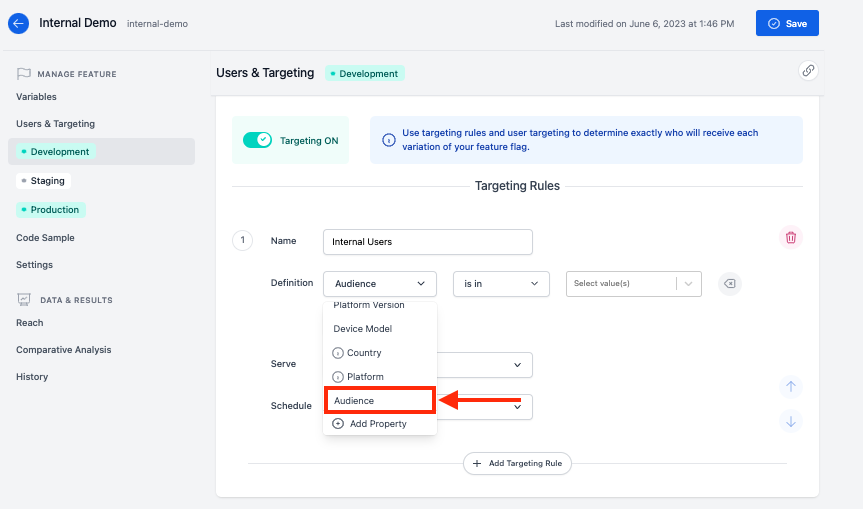
-
Open the user property dropdown, and select Audience
- Choose a comparator.
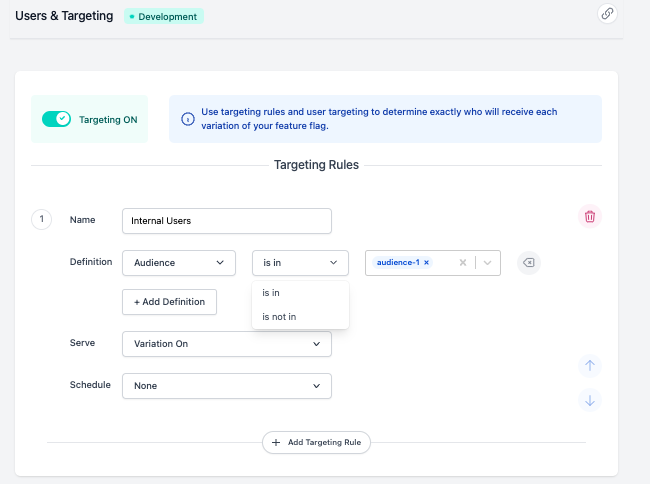
- Choose the Audience(s) that you would like to use in this targeting rule. When multiple Audiences are selected within the same rule, they audiences will act like a a top-level OR, e.g. if the user/target is in
audience-1oraudience-2.
-
Choose a variation to serve.
-
(Optional) Choose a schedule.
-
Click Save at the top of the page when complete.